How to make your embroidery fonts in Tajima DG/ML by Pulse 14 page 2
Digitize
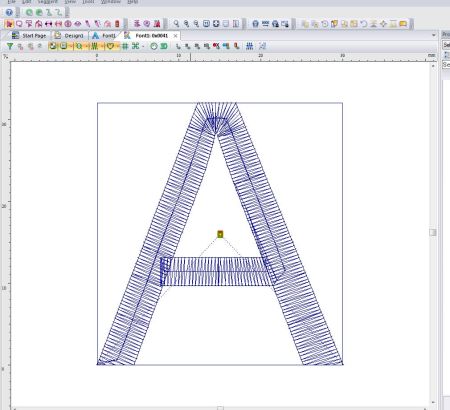
Double clicking on one of the characters will launch that character into a new page and for example letter A, double clicking on it will open a new window. The first segment is my extents box and its there because we had clicked on the wizard/ dialog option create extents box and the second segment in the sequence view is the Artwork segment of the letter itself. So we are ready for digitizing these letters.
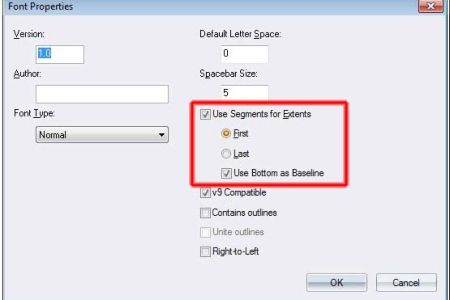
Now, the use of the extents box is since we have marked the option that we want to have the extents box and in the properties page we have made the selection. That is why the extents box which is the rectangle around the letter is on the first position on my sequence view. The kerning box means that it’s like a cage controlling the position of the one letter to the next one.
Digitize based on artwork segments or convert artwork segments into embroidery segments
What I am saying is that you can use your artwork segments and convert it into embroidery segments or you can digitize with your setting tool for example you can digitize the columns of letter A by yourself basically using the artwork segment as the backdrop. At the end of the day, once you have digitized or once you have set the columns you can combine them into one piece, this is important because this will assure that your start and ending points will be used as close point connection.
Make use of the “contains outlines feature.
In the earlier time I have commented you to switch on the setting of contain outlines feature and what you need to do once you have switched on this setting. You need to make sure that in your embroidery style that is your font style in your artwork segments is included in your letter as well. So the sequence would be that in the first position it will Kerning box followed by an artwork segments of my letter and then we have the setting stitch segments of my letter. And then you will see an example image of the letter by using these settings. And you will also see that the border is behind the letter and the reason for this that I have placed the artwork segments after the letter. If had placed the artwork segments after the setting stitch segments then my letter would have the border raised on the top of the letter.
Select a letter symbolizing the text height in proportion to other letters
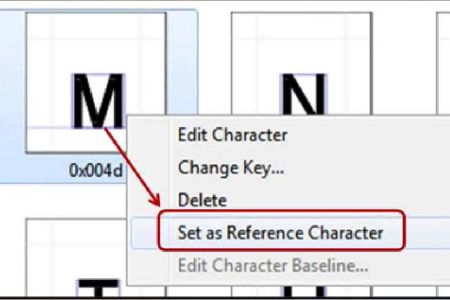
So here what you need to know is that you will have select a letter as a reference for all letters to assure that the text style works correctly on fonts you used in Tajima DG/ML. Normally I would select the upper case letter 'M' as my reference letter because the upper case letter M is mostly the highest one and the tallest letter in my alphabet and its the good choice to have the one, so I would select this as reference.
Test and set Kerning table
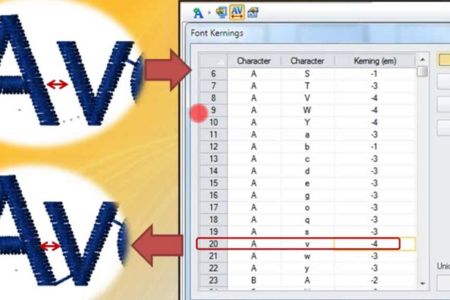
Each letter has its particular shape which means you have rounded letter, letters with diagonal columns, so it all depends on how the shape of the next letter will look like that’s how you will make the decision. You want the letters to be closer or set them apart.
So if you want to have an optical nice looking distance between letetrs then you can use the Kerning table.
Comments
New embroidery projects
New free embroidery
available only for customers
Latest logotypes
sport, auto, food, drink, car, fashion, colleges, entertainment, social, market, business
Embroidery Trend
Add new proposal or trend
Last review
Embroidery, equipment, software and trend news.
Last photos
All photos in Gallery


 Exploring the Magic of Machine Embroidery on Black Fabric: A Dive into Bright and Original Designs
 Native American-Inspired Embroidery: The Beauty of the Dandelion Dreamcatcher