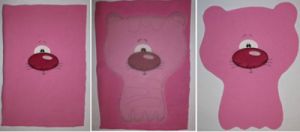
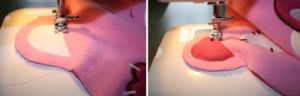
Here is the embroidered result. Then place the transparent template made of thick a semitransparent film, so that little face on the film coincided with embroidery. Cut out the main part of the (front part).
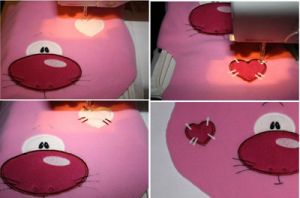
Then, at the cutout of the kitty embroider applique hearts and patches, can be embroidered in any place, as someone like that. It depends on your imagination and desire. You can also change the color (for applique fabric) of your choice.
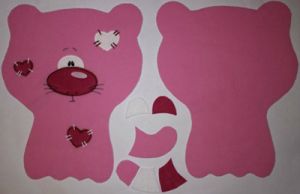
Using a template, cuts out all others any parts of kitty pillow: the back part, parts of tail and ears middles.
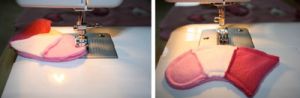
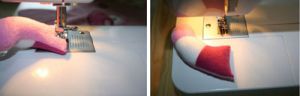
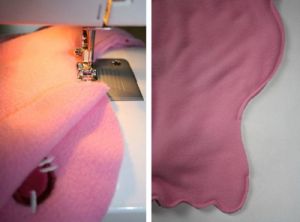
Sew all parts of tail.
Accurately turns tail. And then fill it with synthetic padding or any other filler. The choice depends on the filler will be used as a pillow. Padding polyester allow the use of liquid detergents, stain if the baby pillow.
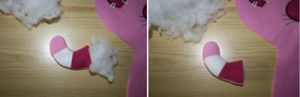
You can use a synthetic fluff. This material is crushed and long lump. He is on the structure of both springs . After that sews up the tail to make it easier sew to kitty.
You can not do this if your experience allows it. Now sew the tail to the kitty main part.
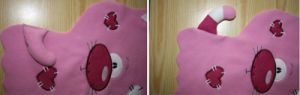
Sew the ears to main part of kitty pillow.
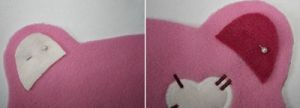
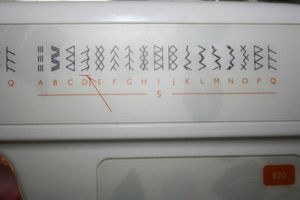
Here we use this type of stitch to sew the ears. This is a recommendation. You can use any other suitable type of stitch that you have on your embroidery machine.
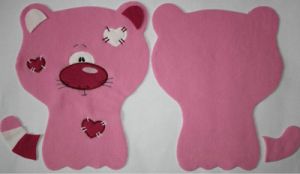
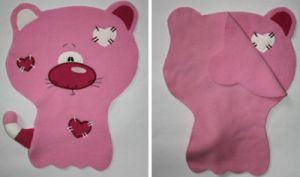
The front part of the pillow "kitty" is fully ready. Impose on the back of the front and sew together. Leaving to the side is not sewn up the hole about 10 cm long, so it passes freely entered hand.
Up turning stitched together parts of kitty.

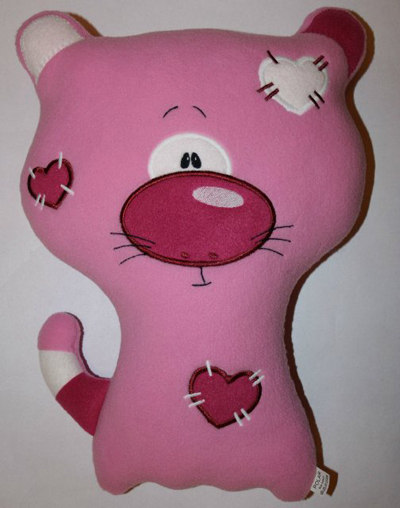
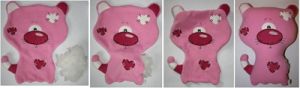
Fill with synthetic padding or other filler. We start from the ears, then the head and lower part of the pad. "Kitty" is plump. It remains only to hand-sew the opening. And here is the finished toy pillow. Kids really like, especially the bed, hugging a soft friend.
Pillow kitty with applique and free embroidery design
Heart applique free embroidery design 1:
Size: 46 x 43 mm, 1.81' x 1.68'
Colors; 3
Stitches: 1768
Heart applique free embroidery design 2:
Size: 60 x 51 mm, 2.36' x 1.99'
Colors; 3
Stitches: 2148
Kitty face applique:
Size: 138 x 127 mm, 5.44' x 4.98'
Colors; 3
Stitches: 4774
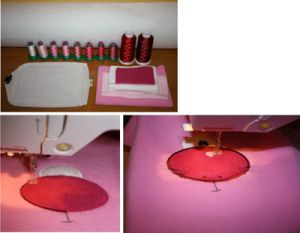
Templates for pillow: For open need free software Adobe Acrobat Reader. Download template. Warning - size format A3 (297 x 420 mm). Cut a piece of fabric around 40 cm x 50 cm (the size of the pillow kitty goes 30 cm x 40 cm). Load the machine embroidery file kitty.* to the embroidery machine and embroider snouts kitties. Small hint. You do not need precise positioning of the design kitty face. All this is doing approximately.
Present to your attention absolutely free project Kitty Pillow. This project is kindly provided to us by Irina Hornung (Lithuania) For this pillow you will need the following materials; fabric, machine embroidery thread, stabilizer. Fabric. For such a kitty is used fleece fabric (you may use any suitable density). Free embroidery designs and applique. You need download free applique designs for this pillow. Please choose embroidery format for your embroidery machine.
Comments
Which browser are you using?
Do you see such a problem on all pages?
This fun and easy tutorial will guide you through creating your very own pillow kitty with applique and free embroidery design. This soft toy is perfect for kids, as a gift, or for adding a touch of feline charm to your home.
Materials:
- Fabric for the kitty pillow (cotton or fleece)
- Fabric scraps for applique (assorted colors and patterns)
- Thread (for embroidery and sewing)
- Embroidery needle
- Sewing machine
- Scissors
- Pins
- Fiberfill or pillow stuffing
- Kitty template (create your own or find one online)
Instructions:
-
Create or print out a kitty template. You can find one online or draw one yourself. Make sure the template includes the body, head, ears, and tail. Cut out the template pieces.
-
Fold your main fabric in half, with the right sides facing each other. Place the kitty template on the fabric and pin it in place. Cut around the template, leaving a 1/4 inch seam allowance.
-
Cut out the applique pieces from the fabric scraps. This can include the eyes, nose, whiskers, and any other embellishments you'd like to add to your kitty. Pin the applique pieces onto the right side of one of the kitty fabric pieces.
-
Thread your embroidery needle with the desired color of thread. Using a basic embroidery stitch (such as a satin stitch or backstitch), sew the applique pieces onto the fabric. Add any additional free embroidery designs you'd like, such as patterns or cute phrases.
-
With the right sides of the kitty fabric pieces facing each other, pin them together. Make sure the applique and embroidery side is facing inward.
-
Sew around the perimeter of the kitty using a 1/4 inch seam allowance. Leave an opening of approximately 3-4 inches on the bottom edge for stuffing.
-
Trim any excess fabric and clip the corners. Turn the kitty right-side-out through the opening.
-
Stuff the kitty with fiberfill or pillow stuffing until it reaches your desired firmness. Make sure to stuff the ears, legs, and tail as well.
-
Fold the raw edges of the opening inward and pin it closed. Sew the opening shut using a ladder stitch or whip stitch, making sure to hide the stitches in the seam.
-
Your pillow kitty with applique and free embroidery design is now complete! Enjoy your new soft toy or give it as a thoughtful, handmade gift.
Remember, you can customize your pillow kitty with different fabric choices, applique designs, and embroidery patterns to make it truly unique. Happy sewing!