Fusing machine embroidery designs to boots
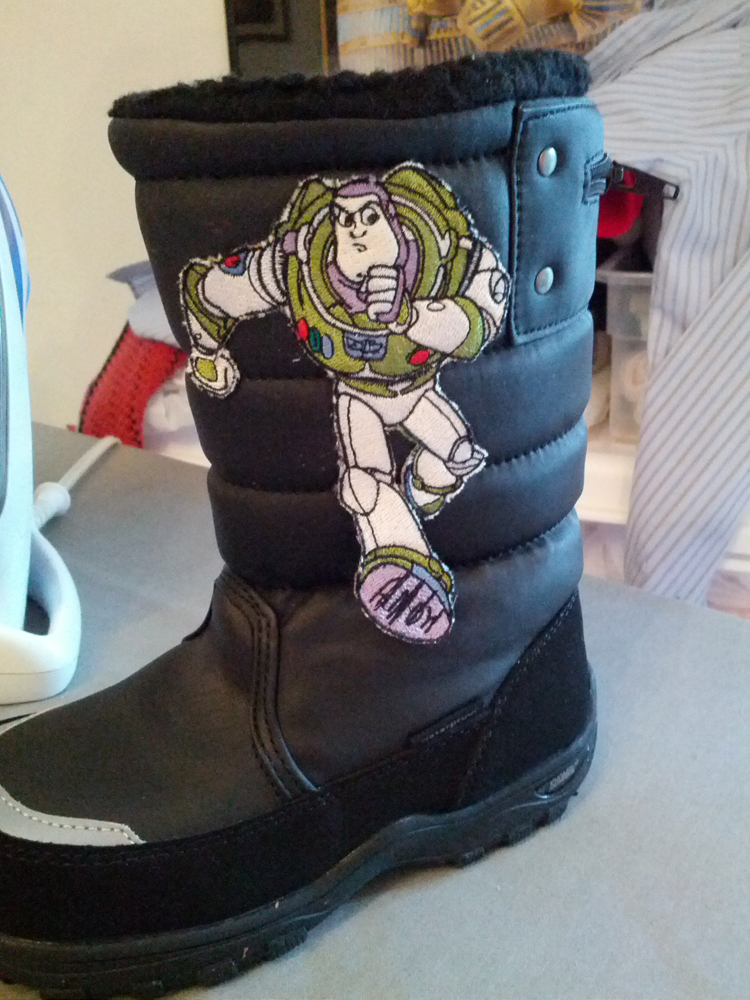
Embroidered winter boots with Buzz machine embroidery design form Toy story collection. Step by step instruction by author Claudia Nelson
Step One: Using Sticky Stitch as stabilizer adhere a 6x9 piece of duck fabric to the sticky. You will use a 5x7 hoop -load the sticky stitch and peel off the paper. Place the fabric firmly on top of the sticky.
Step Two: After stitching out the design, place a piece of Fuse and Bond over the back of the design area and using a hot iron (cotton setting) and a press cloth, firmly press down with the iron for 20 secs. Wait for the area to cool and peel off the paper. Your design is ready to cut out.
Step Three: Take a piece of glass, your hot iron ( with a blade inserted) and place the design on the glass. Using your hot iron/blade cut the design out. This will seal the edges of the design and give you the patch ready for putting on the boot.
Step Four: Now you are ready to place the design on the boot area. Have a hot iron ready and a press cloth. Place the design on the boot area. Cover with a press cloth and press firmly for 20 sec. Check to see that the design is firmly adhered to the boot. You can repeat step four until you are happy that the design is firmly on the boot.
All done:)
For this embroidery project used Buzz rescue embroidery design
Comments
Last photos
All photos with our embroidery designs in Gallery
Look at a huge number of beautiful and successful real projects with our work. You can us tags for search.