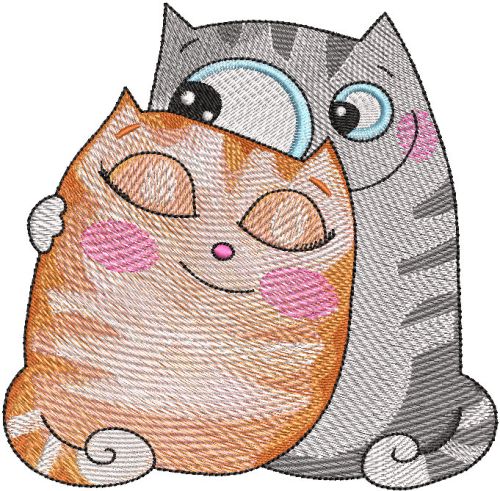
What’s even better than a cat-inspired embroidery design? The one featuring two cats and a double amount of purrfect cuteness! Take a look at this machine embroidery design with grey and red cats hugging each other lovingly. The color palette in this needlework is a combination of yellow, toast, emily pink, ultra blue, floral pink, banner gray and black. Go ahead and stitch out this funny application to any of your favorite belongings, for example T-shirts, hoodies, sweaters, pajamas, towels, blankets, cushions, quilts, aprons, bathrobes, etc. Works nicely with most suitable fabrics.
Comments
How to use this design.
These lovers who are embroidered on a decorative pillow, will bring comfort to the interior of your home. Prior to stitching the parts, machine embroidery of the design is performed on the embroidery or sewing-embroidery machine.
Materials:
Plain Cotton Fabric
Flap Colored Cotton Fabric
Machine Embroidery Top Thread
Machine embroidery bobbin thread
Tear-off stabilizer glue for machine embroidery
Disappearing marker for fabric
Machine Embroidery Design
Details of cut
Square plain cotton fabric with a side length of 30 cm.
Two strips of fabric in a small pattern of size 8x30 cm and two 8x36 cm.
Two strips of fabric in a large pattern of size 8x36 cm and two 10x43 cm.
Corrugated tape 1.5 cm wide and 115 cm long.
A strip of fabric for the shuttle, the width at your discretion, and the length of the strip is 175 cm.
For all the details, add seam allowances for all cuts!
Embroidery
Glue the stabilizer on the wrong side of a single-color fabric, if the stabilizer is thin, glue it in two layers. Tie it into the hoop, place them in the machine and embroider the selected design.
Sewing
Trim a part with embroidery to align the cuts. Sew the ribbon to the front of this part. Sew strips of fabric into small patterns on the upper and lower sides of the square. Iron up. Unscrew the sewn parts up and down, apply long strips of fabric, combining the cuts. Sew these strips and then iron. Sew strips of fabric with a large pattern, according to the scheme described above. You can sew a decorative line at the seams.
Assemble the fabric strip for the shuttle. Pin the cushion around the perimeter. Stitch the seams on the shuttle.
Fold the shuttlecock to the center of the pillow and pin with pins. Stitch around the perimeter while removing the pins while sewing. Place a square on top of the back of the pillow. Sew along the perimeter, carefully making sure that the shuttle does not fall under the needle during sewing. Do not sew the middle of one of the sides, you need to fill a pillow through this hole. Cut corners on the pillow diagonally. Tamp the pillow and sew the hole for the seal by hand. Pillow is ready!