Let’s practice Arial Lucida Handwriting in Tajima Pulse 14
Lets practice and jump into DJ/ML straight away
Let’s change the application to the DG/ML. And we will make one example for a block type fonts and one example for the script type fonts
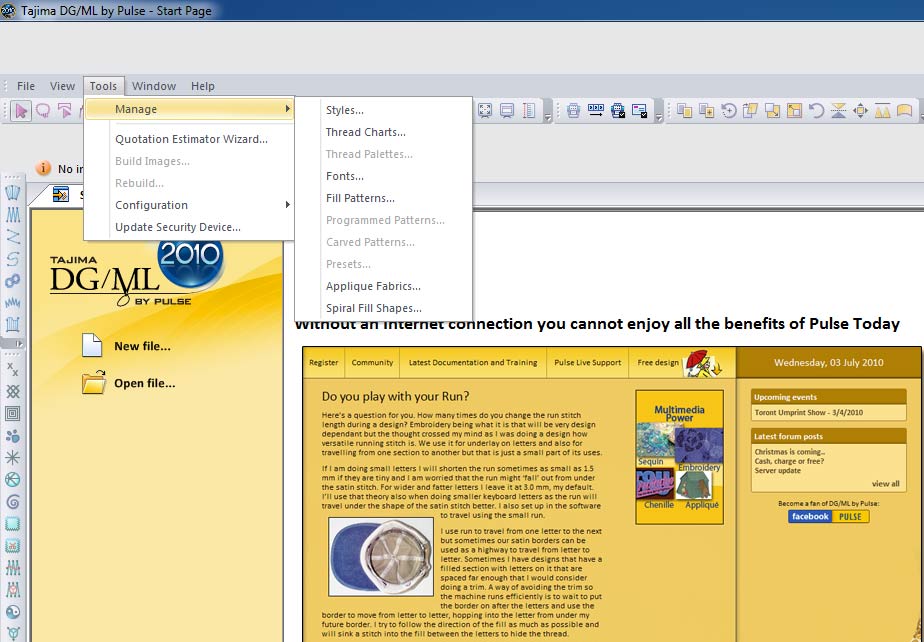
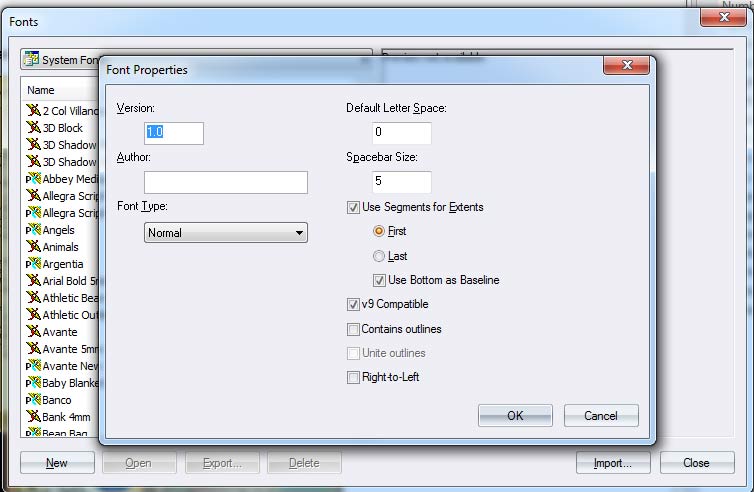
So let’s first start with the block type fonts. Go in to your Tools and then Manage and click to open the option Fonts. That will open a dialogue which I mentioned earlier it will have all the embroidery fonts listed in it and those embroidery fonts that are in my system embroidery folder. We are going to create new embroidery fonts so click on New in the font dialogue box. Then you will have the font properties page opening up as I said we will switch off the version 9 compatible here. We will like to work on additional outlines so I switch this on here and what else, everything else is perfect so let us move and click Continue. Then you will see that you will have an empty font page and I want to populate this page with artwork segments. And I would like to grab those artwork segments from True type fonts that why I am clicking on this option on the Add Character from TTF (click it) as it has characters from True type fonts. Choosing it will show all the true type fonts that are stored in my system. Then, TTF font dialogue box will open.
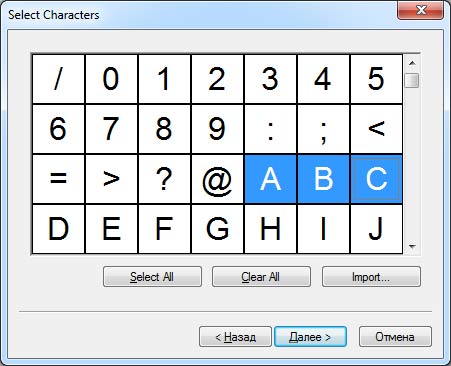
You can try out a sample by choosing Ariel from this dialogue box and type to see how it looks. Then click on Continue. Typically you will select upper case characters or lower case characters or normal couple of symbols. You can see that in true type fonts you have tons of tons of characters. For our little example I would just select the upper case letter A, B and C, I will punch all the letters together to save time then click Continue and you will have the last window in my wizard. The Create Embroidery Segments that is something that I will want to switch off and last two ones we want to have them active so I want to have each letter included as artwork so that good and I want to have a Kerning box in an extents box and then click Finish.
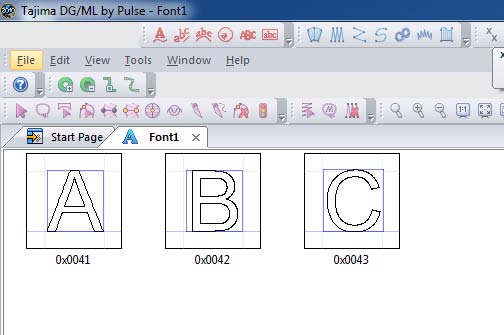
After that those letter will be collected and converted into artwork segments. So now our page is now populated with letters A, B and C and as I mentioned earlier that each letter has unique code numbers as well. And you can also see that there is Kerning box around the letter which is symbolized in the light blue color as well as the letter itself has a Black color outline. That’s how you can display those characters.
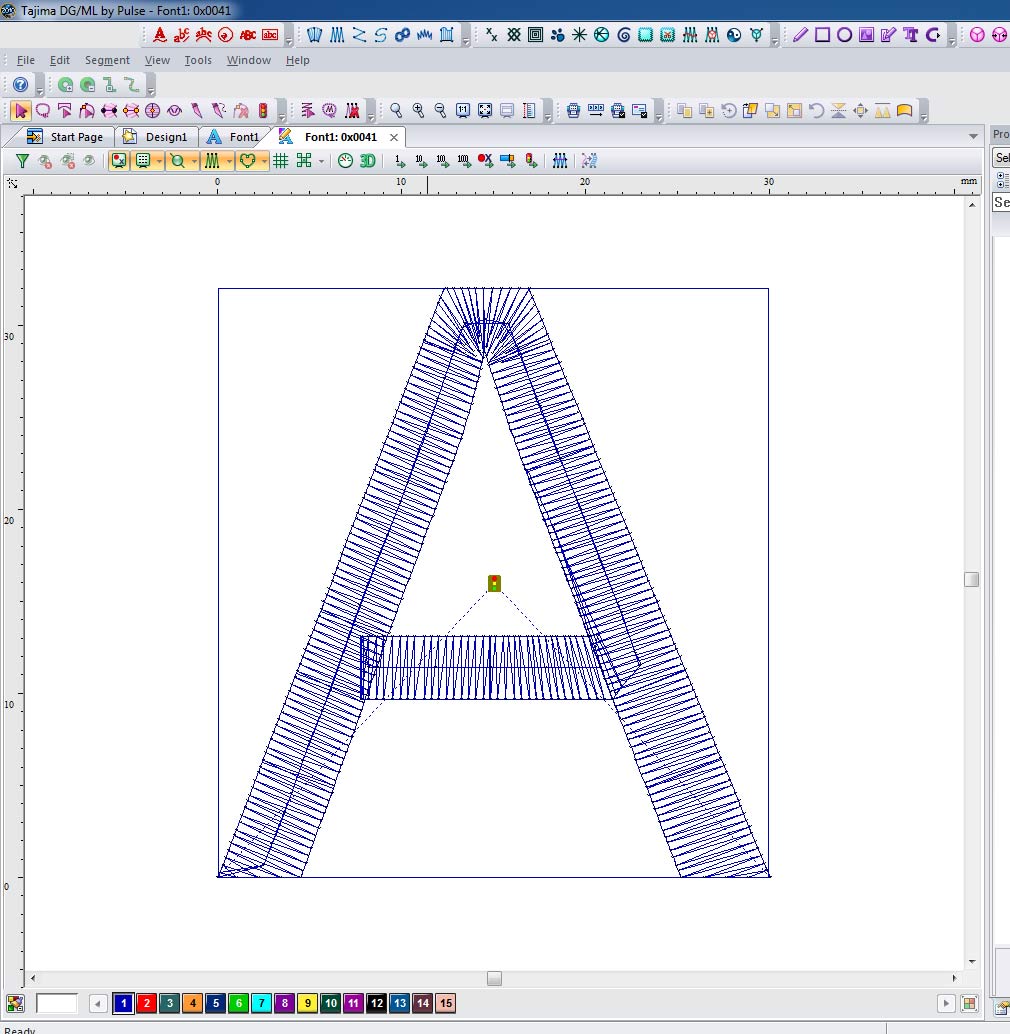
Now let’s go and work on letter A, so click on it. That will launch that letter into Tajima DG/ML. Then you will see the extents box which is automatically created by the Tajima DG/ML around the letter and we have the letter itself as the artwork segment. You can also get rid of any points in the characters but for that you will have to convert them into straight points.

And then I would like to Copy Paste that is Ctrl C and V and have two artwork segments and then convert this sample letter A into setting segments, I use Slice tool and cut it. You can break up with Ctrl K and then you can move the ankle points. Then select all the points of the letter from the start point to the end point of each column and combine them CTRL L.
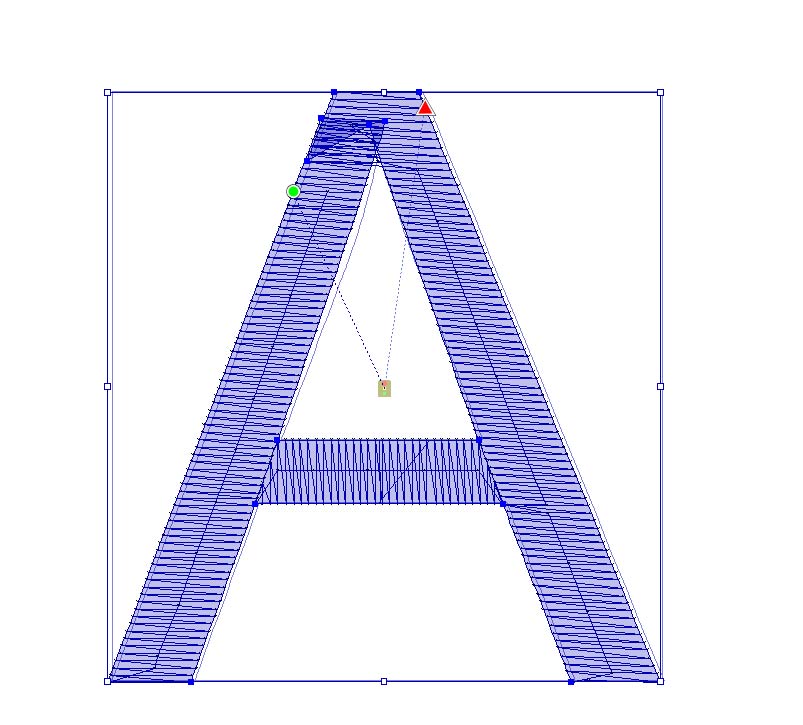
You can also use the setting in the Text segment which is called the Point Connection which will automatically connect the closest distance from the one letter to the other but there is one another option that you use and that’s Digitize and the Tajima DG/ML will have the start and end points of each letter exactly how they would digitize. Now, Ctrl S and now I save and close that page. As I save my letter it will get updated or refreshed and it will become digitized letter if you see. Also you have a couple of election is the View options such as No stitches from stitches and when you see there the letter will symbolize stitches. So it’s up to you what you want to have here.
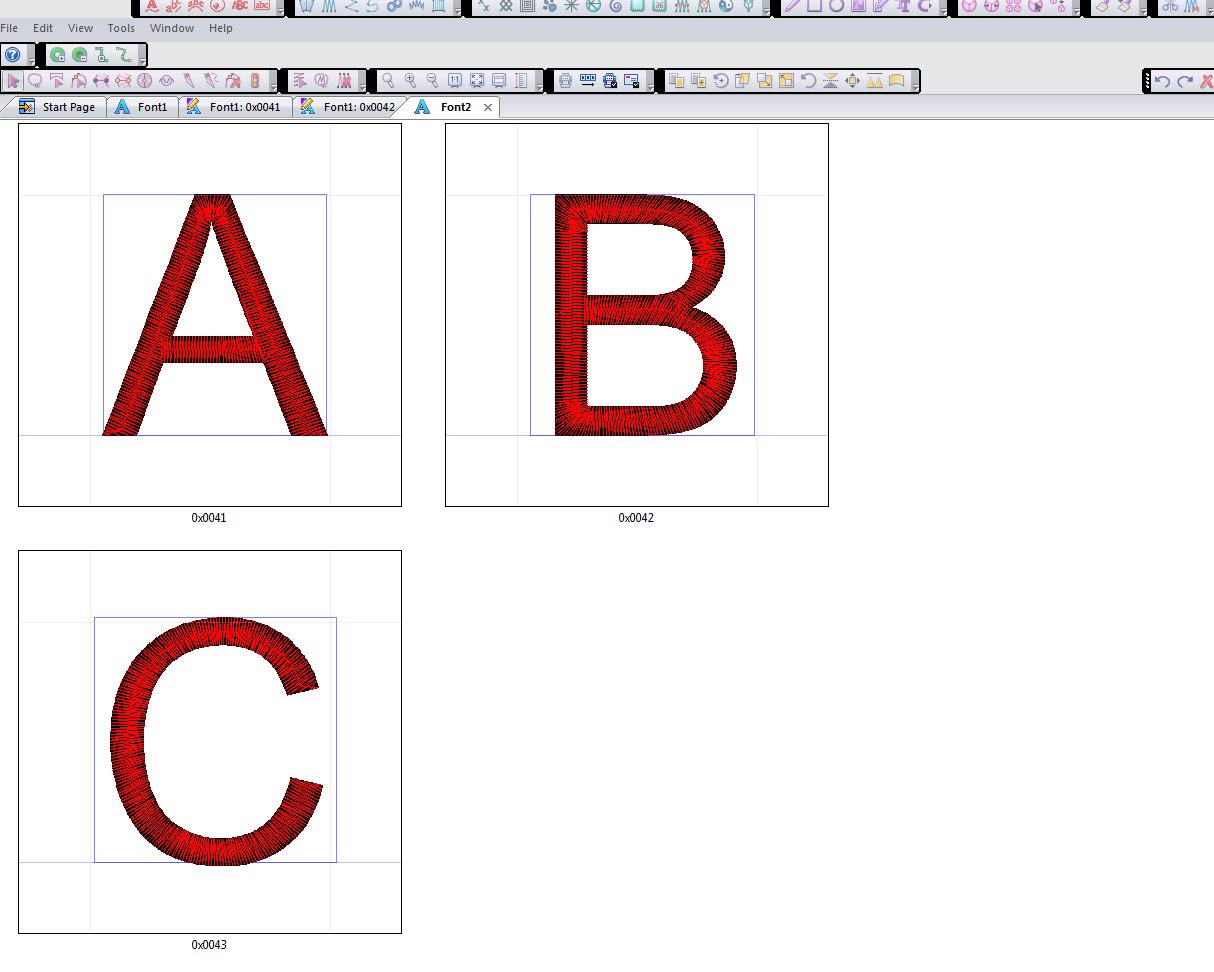
For now we will go back to No stitches and we will move ahead. So will click on File and see there are two options Save or Save As, when you Save for the first time it will request you to enter a name for your font. Give it a name and it will get saved into your system folder. Now you can same way continue with letter B and letter C and save each of these. Now on the New page I will use my Text Tool and I will search for my block fonts and we will choose a font size also, like 12 pt and we will type ABCA and soon you will see the letters are there on the page. Double click on the letter and go to properties. The setting I was talking about is in Fill and Border which is called as Border and Fill. Right now default I will change it to Still and Fill. And I would like to have to change the color if you select Automatic it will automatically change to the next color in the order which is Red, so it will change to Red. But if you say if you want to choose manual then select the color you want and then click on apply. You can see that the border is behind the still and fill letter.
Now let me show you the kerning tables right here with the block texts. The distance between AB and CA letters in our sample is more, so I will like to have a closer distance between the two. In order to accomplish this I go to my font and there is this function called Kernings. That will open up the Kernings table and here you have Character so we want to work on upper case B and we want to have the next one C and closer distance will be a negative value. You will need to Save it in order to have it active. And then you can check that out on your text, which will give you a nice kind of text. The Tajima DG/ML gives you options to check your text and straight away makes changes easily and you can have many letter combinations as well. This concludes the example on block fonts.
Let’s jump straight into the creation of the script fonts. We go into the tools and click on fonts and creating new one. Again take the same options and then click on the font file and take the saved script type of font. Select lower case letters a, b and c and save it as well by giving it a name. Again follow the same above procedure and use extent box to expand or change the features of the letter in to different forms. Combine the points and Ctrl S. then do the same with the lower case letter b and c. open a New page search for your script fonts and use a height for the font and type something. And there you go; you will have the letters in front of you. This concludes our article on how to create embroidery fonts. I hope you have learnt couple things to start before creating your own embroidery fonts.
Comments
New embroidery projects
 Exploring the Magic of Machine Embroidery on Black Fabric: A Dive into Bright and Original Designs
 Native American-Inspired Embroidery: The Beauty of the Dandelion Dreamcatcher
New free embroidery
available only for customers
Latest logotypes
sport, auto, food, drink, car, fashion, colleges, entertainment, social, market, business
Embroidery Trend
Add new proposal or trend
Last review
Embroidery, equipment, software and trend news.
Last photos
All photos in Gallery